Gluten Free Sourdough Pizza Crust Recipe (Crispy, Chewy & Actually Delicious!)
Updated on November 11, 2025
This post may contain affiliate links.
Jump to a Section:
Introduction
For years, I thought truly great gluten free pizza was impossible. Every crust I tried was either cardboard-dry, crumbly, or tasted distinctly “gluten free” in that disappointing way. Then I started experimenting with gluten free sourdough pizza crust, and everything changed. The fermentation transforms gluten free flours, creating a crust with actual chew, incredible flavor, and a crispy exterior that rivals traditional pizza.
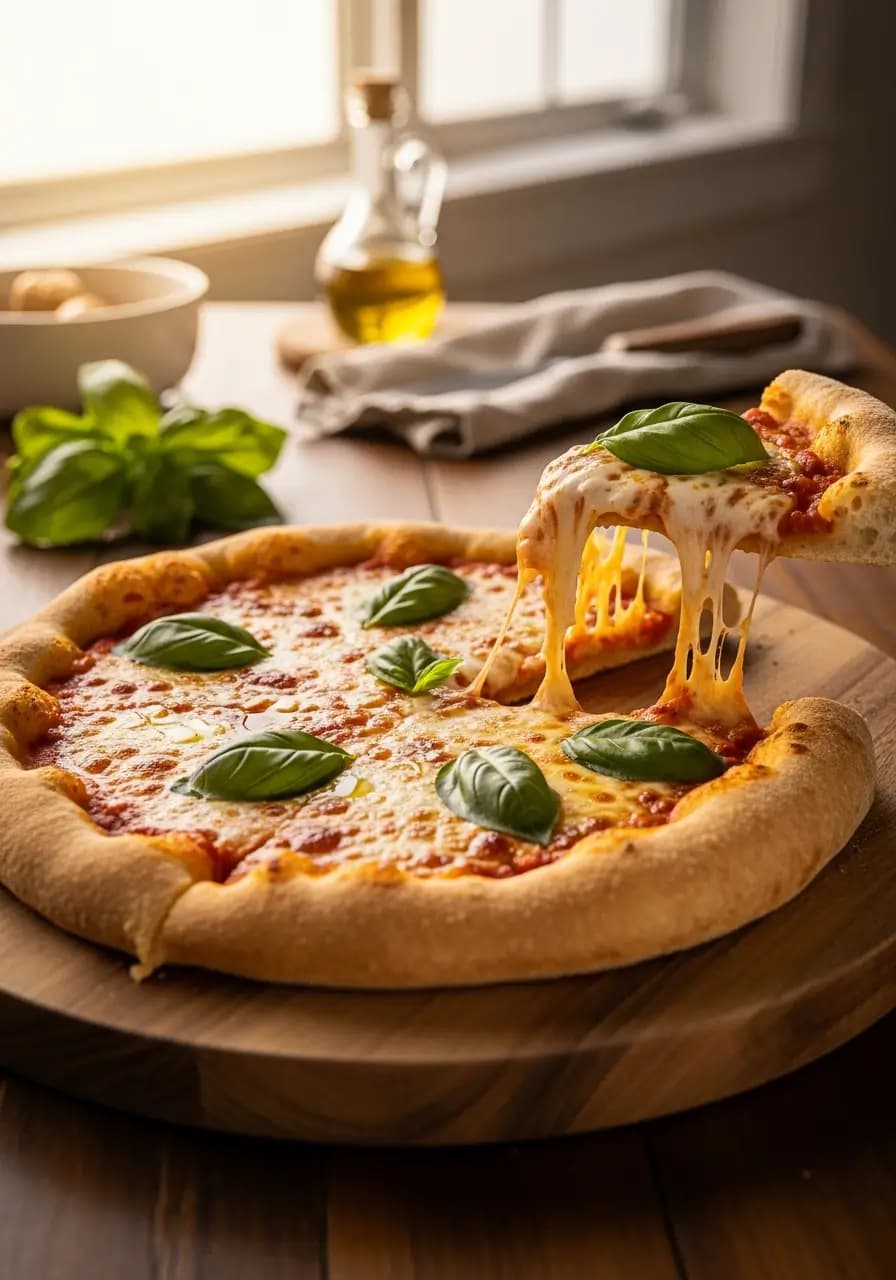
If you’re searching for the best gluten free sourdough pizza crust recipe, you’ve just found it. This crust delivers everything you’ve been missing: crispy, golden-brown exterior with slight char, chewy interior that doesn’t fall apart, complex sourdough flavor that enhances toppings, and authentic pizza texture you won’t believe is gluten free. The gluten free sourdough starter adds depth and improves texture in ways regular GF pizza recipes simply can’t achieve.
This recipe uses a blend of gluten free flours and psyllium husk for structure, creating a dough that’s actually workable and stretches without tearing. Whether you have celiac disease, gluten sensitivity, or simply prefer gluten free eating, this pizza will make you excited about pizza night again.
Why Gluten Free Sourdough Pizza is Better
Using gluten free sourdough starter elevates GF pizza in remarkable ways:
- Superior Texture: The fermentation develops structure and elasticity that gluten free flours lack naturally. The crust actually has chew and doesn’t crumble into pieces.
- Enhanced Flavor Complexity: Gluten free flours can taste bland or have off-flavors. Sourdough fermentation creates depth, tanginess, and complexity that masks any “gluten free” taste.
- Better Digestibility: The long fermentation breaks down complex starches and proteins, making GF pizza easier to digest. Many people find fermented GF foods gentler on their systems.
- Improved Rise: Active gluten free starter provides natural leavening that creates a lighter, airier crust compared to yeast-only or yeast-free GF recipes.
- Authentic Pizza Character: The slight sour notes from fermentation are characteristic of traditional Neapolitan pizza. It tastes more authentic, not like a compromise.
- Nutritional Benefits: Fermentation increases bioavailability of nutrients and can reduce the glycemic impact of the flours.
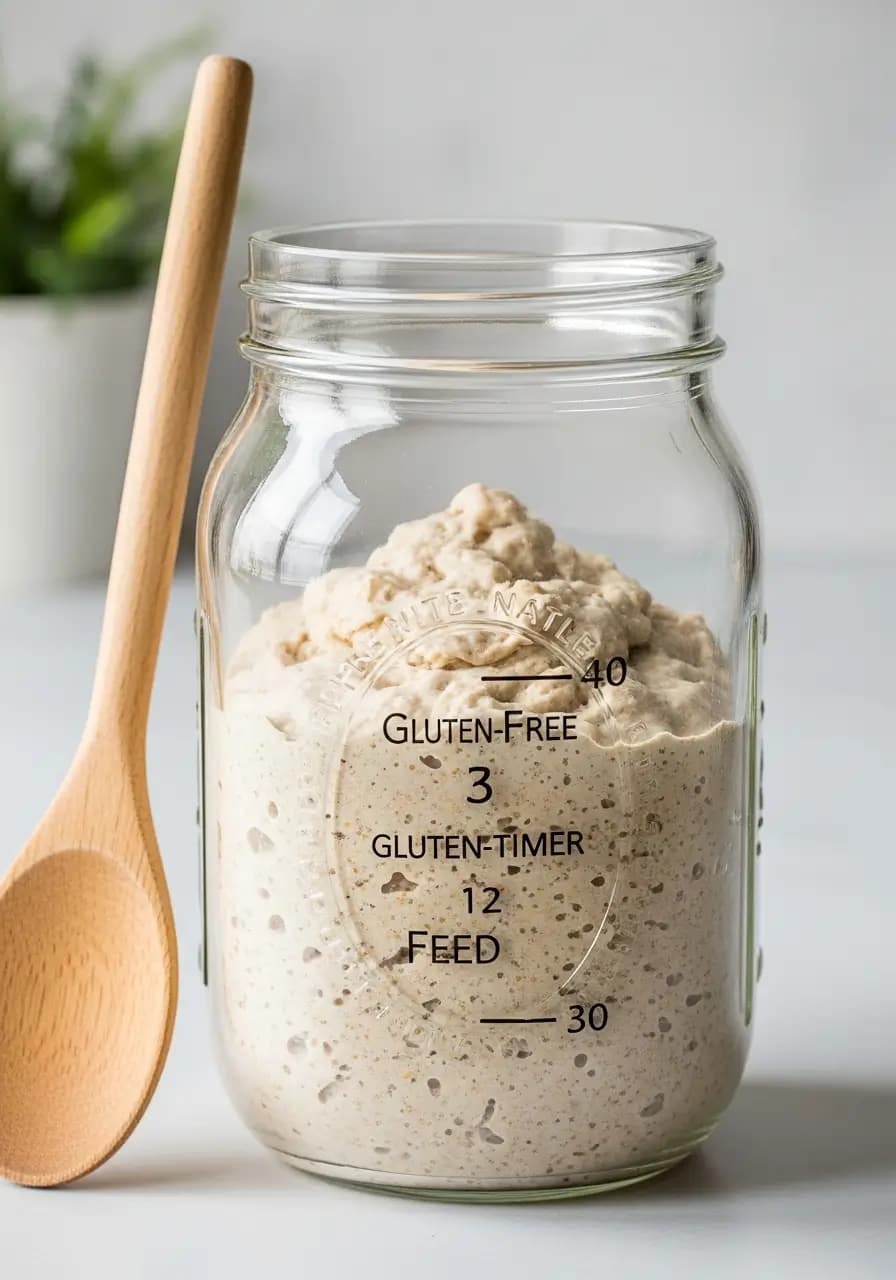
About Gluten Free Sourdough Starter
Do You Need a Gluten Free Starter?
Yes! This recipe requires an active gluten free sourdough starter. If you have a wheat-based starter, you cannot use it for gluten free baking—even trace amounts contaminate the recipe.
Making a Gluten Free Starter
Creating a gluten free sourdough starter is simple:
- Day 1: Mix 50g gluten free flour blend + 50g water in jar. Cover loosely.
- Days 2-7: Daily, discard half and feed with 50g GF flour + 50g water.
- Day 7-10: Starter should double within 4-8 hours of feeding—it’s ready!
Best Flours for GF Starter: Brown rice flour, white rice flour, or a gluten free all-purpose blend. Avoid bean flours initially (they can smell unpleasant).
Maintenance: Feed weekly if refrigerated, daily if kept at room temperature. GF starters are often more vigorous than wheat starters.
Ingredients for Gluten Free Pizza Crust
For the Pizza Dough:
- Active Gluten Free Sourdough Starter (200g / 1 cup): Freshly fed and at peak (doubled in size, bubbly).
- Gluten Free All-Purpose Flour Blend (300g / 2½ cups): Use a blend with xanthan gum, or add 1 teaspoon xanthan gum separately.
- Brown Rice Flour (60g / ½ cup): Adds structure and authentic flavor.
- Tapioca Starch (30g / ¼ cup): Creates chewiness and helps with browning.
- Psyllium Husk Powder (2 tablespoons): Critical for binding and creating stretchable dough. Must be powder, not whole husks.
- Warm Water (240ml / 1 cup): 100-110°F for best results.
- Olive Oil (3 tablespoons): Adds flavor and prevents sticking.
- Honey or Sugar (1 tablespoon): Feeds the starter and promotes browning.
- Salt (1½ teaspoons): Essential for flavor.
- Instant Yeast (1 teaspoon, optional): Guarantees rise alongside starter.
For Baking:
- Cornmeal or Rice Flour: For dusting pizza peel
- Olive Oil: For brushing crust edges
Recommended Flour Blends:
- King Arthur Gluten Free All-Purpose Flour: Contains xanthan gum, works excellently
- Bob’s Red Mill 1-to-1 Baking Flour: Good all-purpose option
- Cup4Cup: Premium blend, excellent results
- Homemade Blend: 2 parts rice flour + 1 part tapioca starch + 1 part potato starch + 1 teaspoon xanthan gum per cup
Baking Tips for Crispy Crust
The Crispy Crust Challenge
Getting crispy GF pizza crust requires specific techniques:
Preheat Thoroughly: Pizza stone must be screaming hot—preheat for 45-60 minutes at maximum temperature.
Par-Bake is Essential: Unlike wheat dough, GF dough must be par-baked before topping. This sets the structure and prevents sogginess.
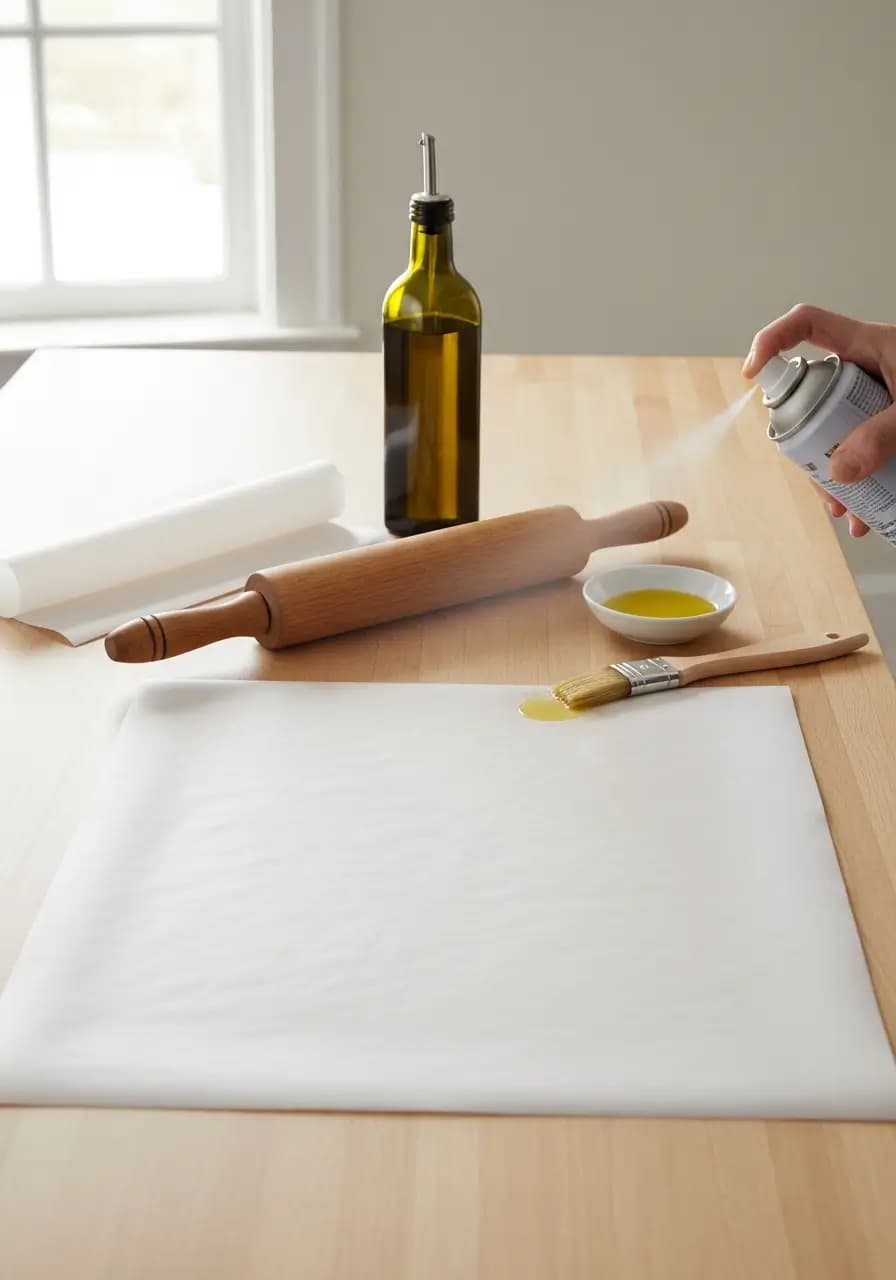
Use Parchment Paper: GF dough is too delicate to transfer without it. The parchment helps with handling and can stay under the pizza during baking.
Don’t Overload Toppings: Heavy, wet toppings make GF crust soggy. Keep sauce thin, cheese moderate, toppings light.
High Heat is Critical: Bake at highest temperature your oven allows (475-500°F). Lower temperatures produce soft, not crispy, crust.
Consider a Pizza Steel: Even better heat retention than stone, creates extra-crispy bottoms.
Broiler Finish (Optional): For extra crispiness, finish pizza under broiler for 1-2 minutes. Watch carefully to prevent burning.
Pro Tips for Perfect GF Pizza
Psyllium Husk is Non-Negotiable: This is what creates the stretchy, cohesive texture GF dough needs. Must be powder form, not whole husks. No substitutions work as well.
Measure by Weight: GF baking is more sensitive to measurements. A kitchen scale ensures consistency and success.
Don’t Expect Wheat Dough Behavior: GF dough won’t stretch, toss, or handle like wheat dough. It’s more like thick batter that you press and shape.
Oiled Hands are Essential: Keep a small bowl of olive oil nearby. Oil your hands frequently when handling the dough to prevent excessive sticking.
Cold Fermentation Improves Flavor: If time allows, refrigerate dough overnight. The extended fermentation significantly improves taste and texture.
Thinner is Better: Resist making thick crust. GF pizza works best when rolled relatively thin (¼ inch) so it can crisp properly.
Test Your Oven Temperature: Use an oven thermometer. Many ovens run 25-50°F cooler than the display shows, which prevents proper crisping.
Avoid Cross-Contamination: If making GF for celiac disease, ensure all equipment, work surfaces, and ingredients are completely gluten free.

Step-by-Step Instructions
Step 1: Feed Your Starter (4-8 Hours Before)
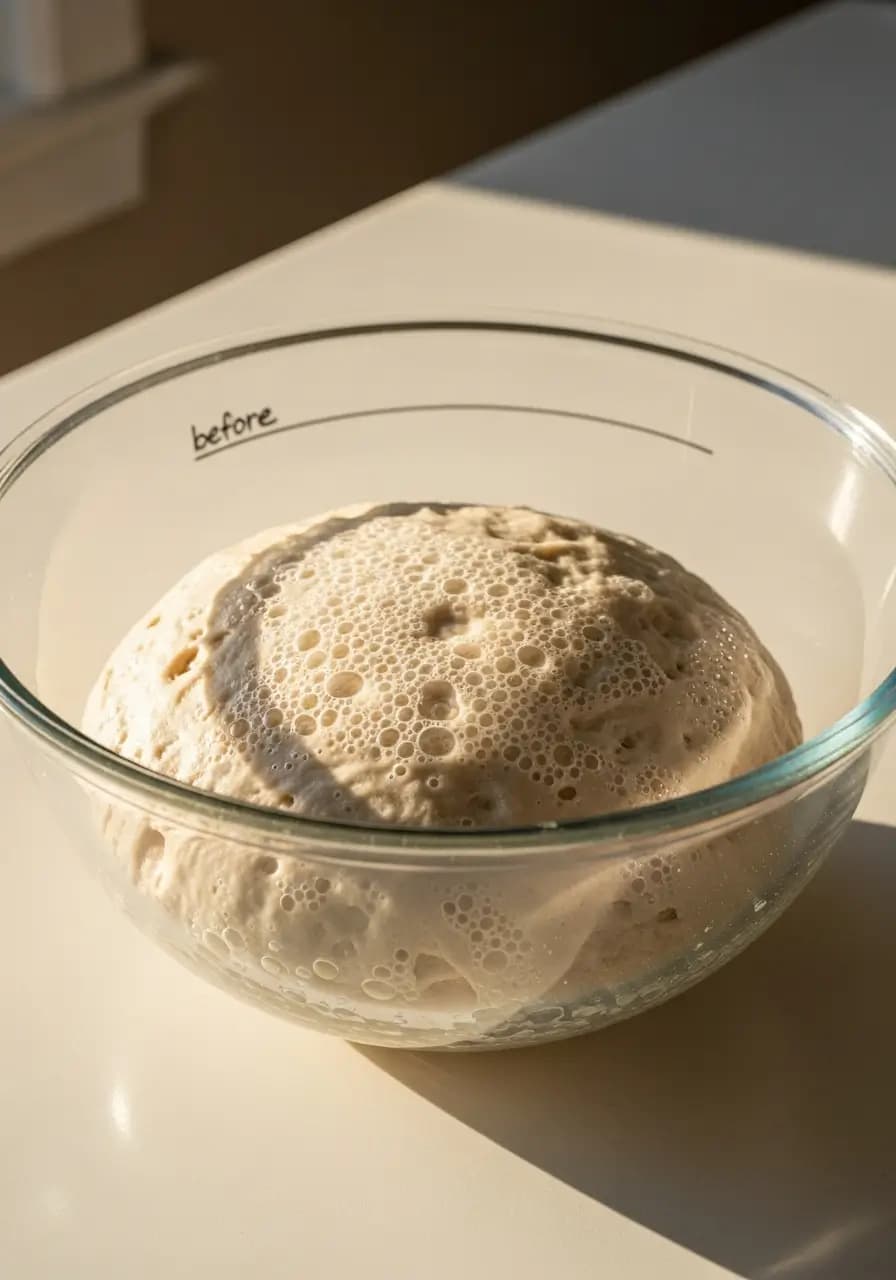
Feed your gluten free starter with equal parts GF flour and water (e.g., 50g flour + 50g water). Let it ferment until doubled in size, bubbly, and at peak activity. Active starter is crucial for proper rise and flavor.
Step 2: Mix the Dough
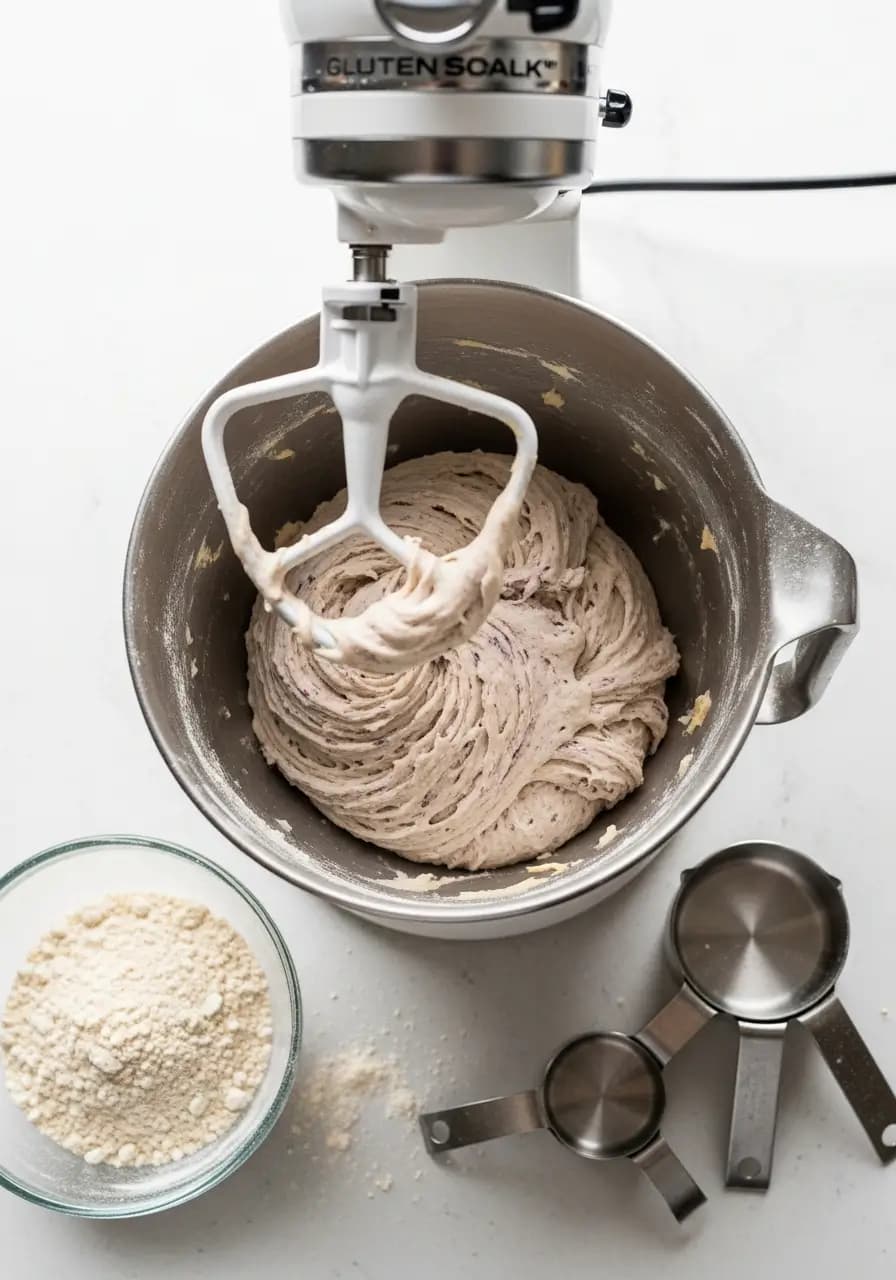
In a large bowl or stand mixer, combine the active gluten free starter, warm water, olive oil, honey, and yeast (if using). Stir until well mixed. In a separate bowl, whisk together the GF flour blend, brown rice flour, tapioca starch, psyllium husk powder, and salt.
Add the dry ingredients to the wet mixture. Mix on low speed with dough hook or stir vigorously with a wooden spoon for 2-3 minutes. The dough will be wetter and stickier than wheat pizza dough—this is correct. It should be thick but spreadable, like thick cake batter.
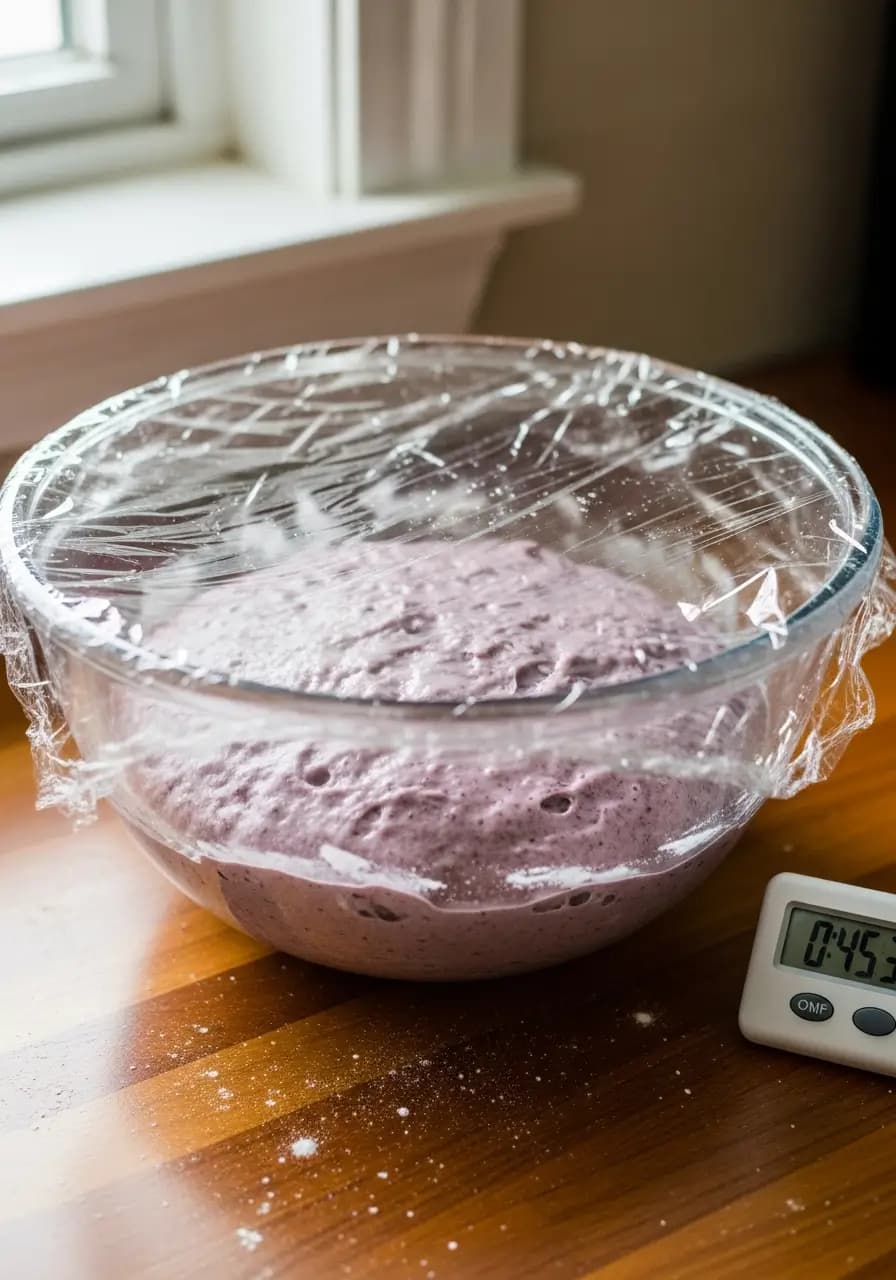
Step 3: Rest the Dough
Cover the bowl with plastic wrap or a damp towel. Let rest at room temperature for 30-60 minutes. This resting time is essential—the psyllium husk needs to hydrate and the dough will thicken significantly. After resting, the dough should be thick, cohesive, and slightly sticky but manageable.
Gluten Free Sourdough Pizza Crust Recipe (Crispy, Chewy & Actually Delicious!)
Equipment
- Stand mixer or large bowl Kitchen scale (highly recommended)
Ingredients
Instructions
- 1
Feed GF starter 4-8 hours before making dough. Use when doubled and bubbly.
- 2
In large bowl, combine active GF starter, warm water, olive oil, honey, and yeast. In separate bowl, whisk together GF flour blend, brown rice flour, tapioca starch, psyllium husk powder, and salt.
- 3
Add dry ingredients to wet. Mix on low speed or stir vigorously for 2-3 minutes. Dough will be thick but spreadable, like thick batter.
- 4
Cover and rest at room temperature 30-60 minutes. Dough will thicken significantly.
- 5
Leave covered at room temperature 2-4 hours until risen 50-75%. Or refrigerate overnight for better flavor.
- 6
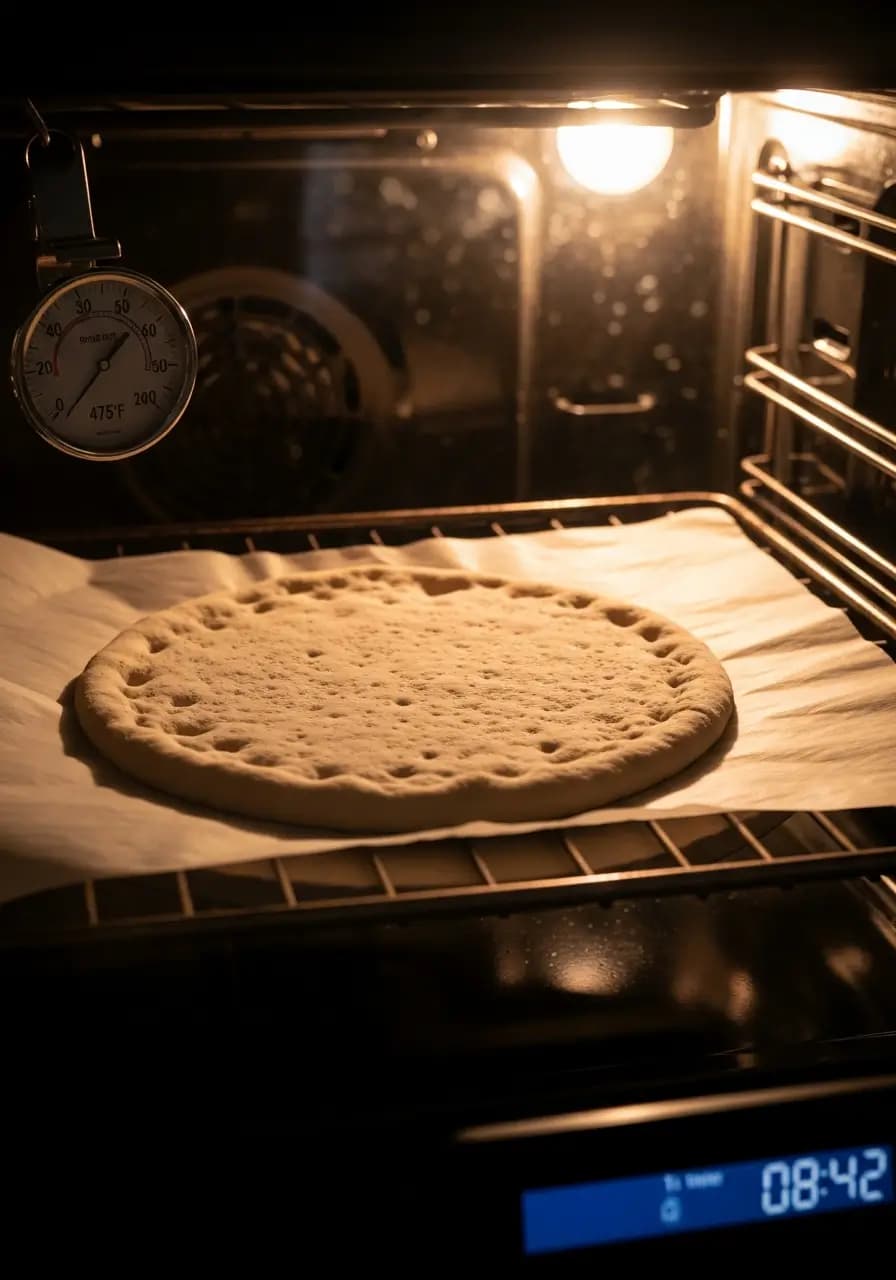
Preheat oven to 475°F (245°C) with pizza stone on middle rack for 45 minutes.
- 7
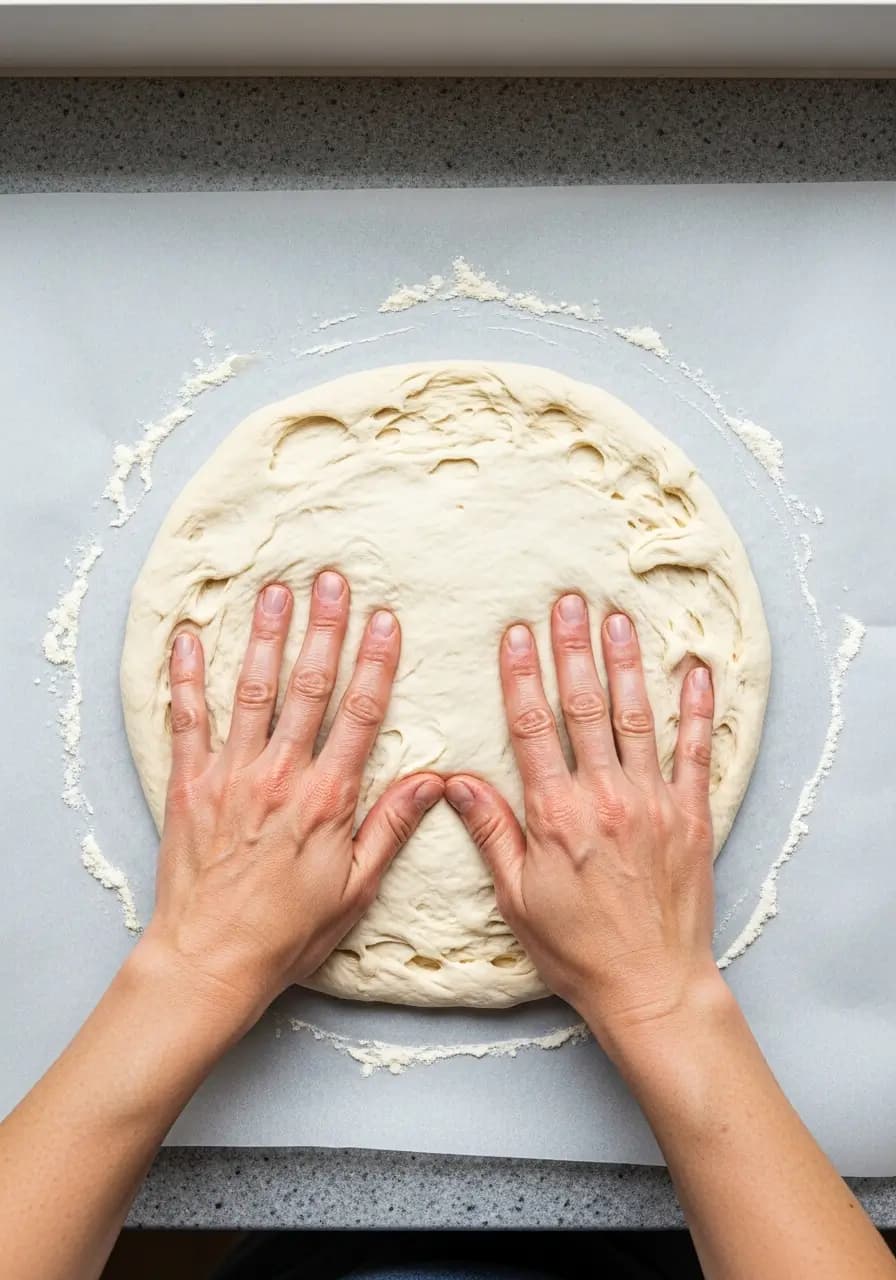
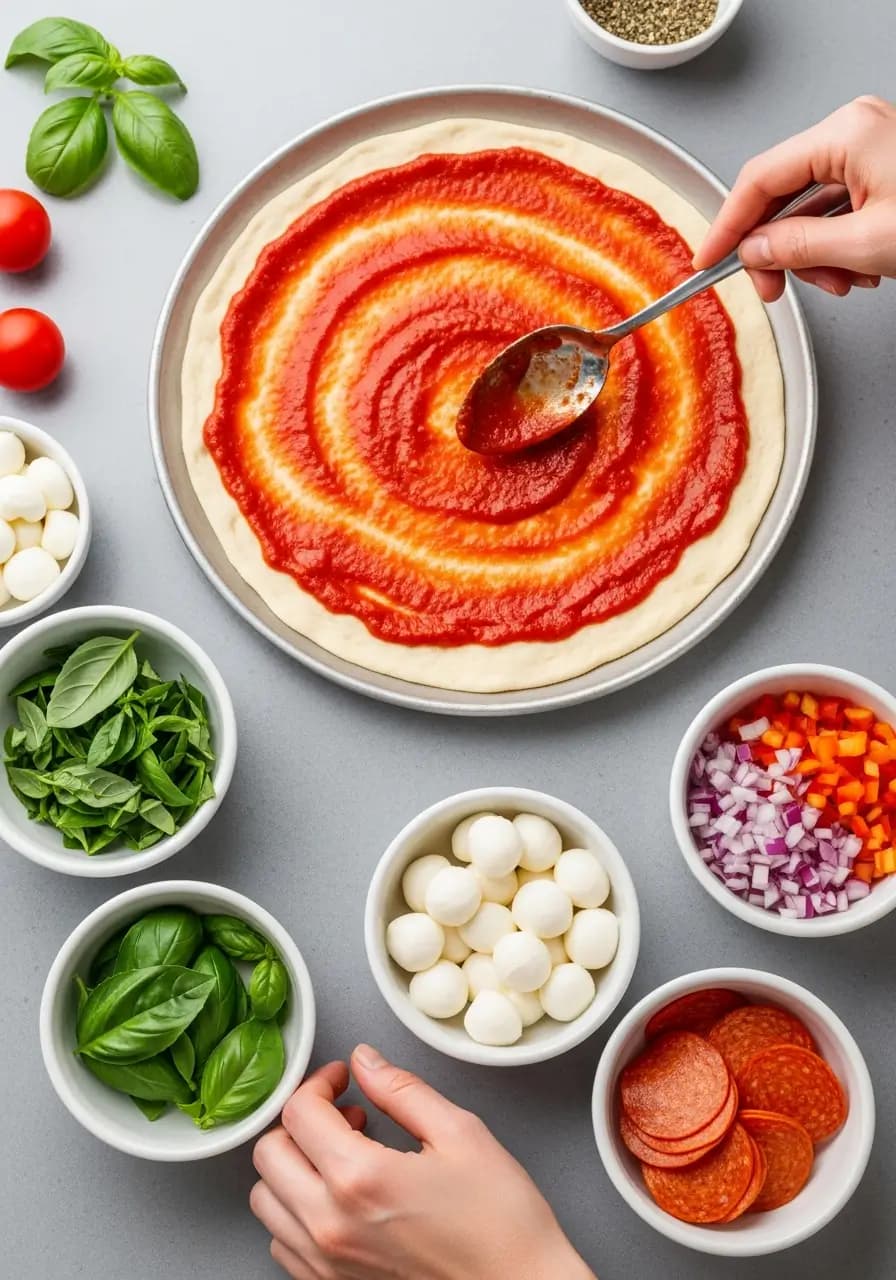
Place parchment on work surface, spray with oil. Scrape dough onto parchment. With oiled hands, pat and press into 12-14 inch circle. Use rolling pin between two parchment sheets for even thickness. Prick center with fork.
- 8
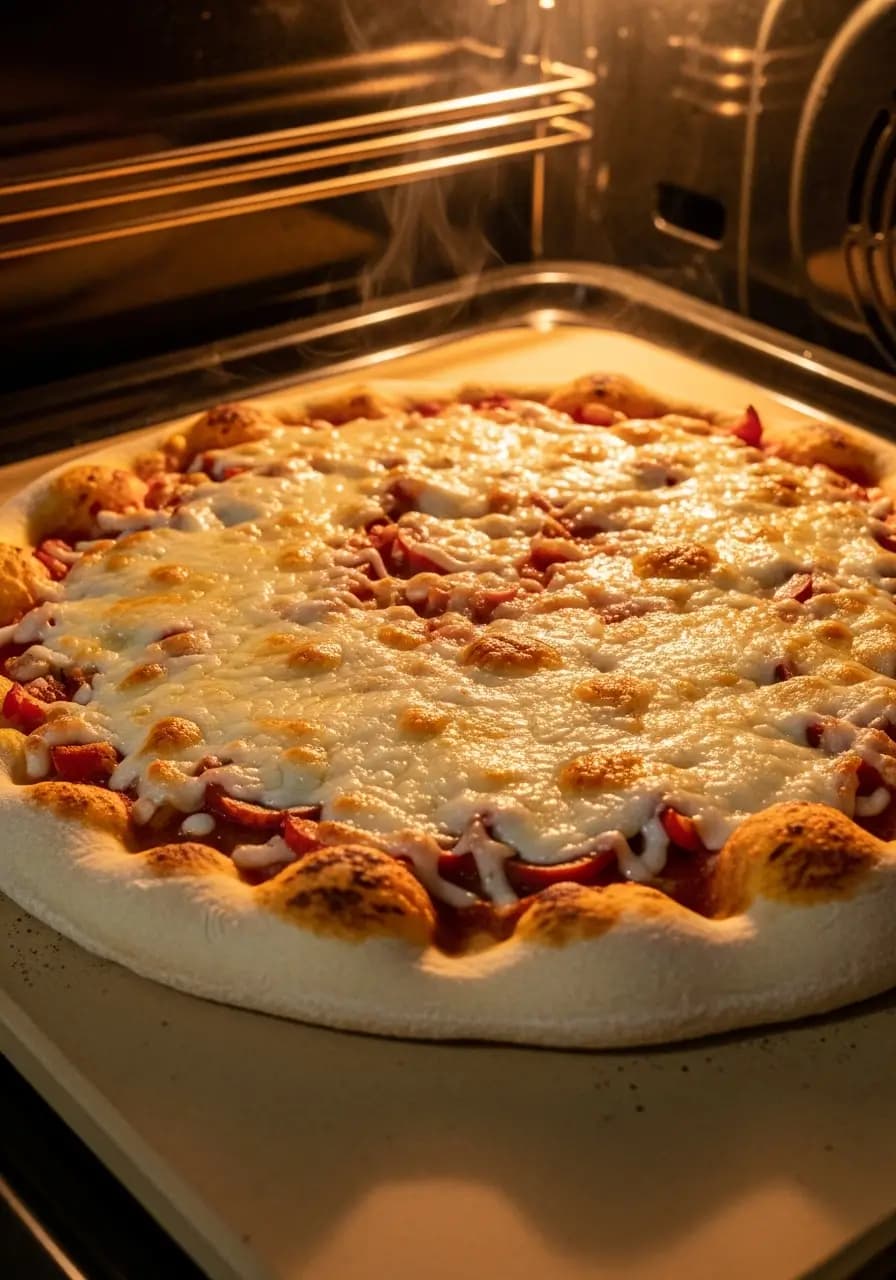
Slide parchment with dough onto preheated stone. Par-bake 8-10 minutes until set and just beginning to brown.
- 9
Remove from oven. Add sauce, cheese, and toppings (don't overload).
- 10
Return to oven. Bake 10-15 minutes until cheese is bubbly and crust is golden. For extra crispiness, slide off parchment for last 2-3 minutes.
- 11
Brush crust edges with olive oil. Cool 2-3 minutes before slicing.
Notes
- Must use gluten free sourdough starter—wheat starter will contaminate
- Psyllium husk powder is essential for structure
- Par-baking step cannot be skipped
- GF dough doesn’t stretch—press and roll instead
- Keep toppings light to prevent soggy crust
- Pizza stone and high heat create crispy results
- Measure by weight for best consistency
Baking Tips for Crispy Crust
The Crispy Crust Challenge
Getting crispy GF pizza crust requires specific techniques:
Preheat Thoroughly: Pizza stone must be screaming hot—preheat for 45-60 minutes at maximum temperature.
Par-Bake is Essential: Unlike wheat dough, GF dough must be par-baked before topping. This sets the structure and prevents sogginess.
Use Parchment Paper: GF dough is too delicate to transfer without it. The parchment helps with handling and can stay under the pizza during baking.
Don’t Overload Toppings: Heavy, wet toppings make GF crust soggy. Keep sauce thin, cheese moderate, toppings light.
High Heat is Critical: Bake at highest temperature your oven allows (475-500°F). Lower temperatures produce soft, not crispy, crust.
Consider a Pizza Steel: Even better heat retention than stone, creates extra-crispy bottoms.
Broiler Finish (Optional): For extra crispiness, finish pizza under broiler for 1-2 minutes. Watch carefully to prevent burning.
Pro Tips for Perfect GF Pizza
Psyllium Husk is Non-Negotiable: This is what creates the stretchy, cohesive texture GF dough needs. Must be powder form, not whole husks. No substitutions work as well.
Measure by Weight: GF baking is more sensitive to measurements. A kitchen scale ensures consistency and success.
Don’t Expect Wheat Dough Behavior: GF dough won’t stretch, toss, or handle like wheat dough. It’s more like thick batter that you press and shape.
Oiled Hands are Essential: Keep a small bowl of olive oil nearby. Oil your hands frequently when handling the dough to prevent excessive sticking.
Cold Fermentation Improves Flavor: If time allows, refrigerate dough overnight. The extended fermentation significantly improves taste and texture.
Thinner is Better: Resist making thick crust. GF pizza works best when rolled relatively thin (¼ inch) so it can crisp properly.
Test Your Oven Temperature: Use an oven thermometer. Many ovens run 25-50°F cooler than the display shows, which prevents proper crisping.
Avoid Cross-Contamination: If making GF for celiac disease, ensure all equipment, work surfaces, and ingredients are completely gluten free.
Topping Ideas & Flavor Combinations
Classic Combinations
Margherita: Tomato sauce, fresh mozzarella, basil leaves, olive oil, sea salt
Pepperoni Classic: Tomato sauce, mozzarella, pepperoni, dried oregano, chili flakes
White Pizza: Garlic olive oil base, ricotta, mozzarella, parmesan, fresh herbs
BBQ Chicken: BBQ sauce, mozzarella, grilled chicken, red onion, cilantro (add after baking)
Gourmet Options
Prosciutto & Arugula: Tomato sauce, mozzarella, add prosciutto and fresh arugula after baking, drizzle with balsamic glaze
Mushroom Truffle: White sauce, mixed mushrooms, fontina, truffle oil drizzle
Fig & Goat Cheese: Olive oil base, goat cheese, caramelized onions, fresh figs, honey drizzle, arugula
Greek Pizza: Olive oil base, feta, kalamata olives, tomatoes, red onion, oregano, finish with tzatziki
Dietary-Friendly Toppings
Dairy-Free: Use cashew cheese, nutritional yeast, or dairy-free mozzarella
Vegan: Vegetables, dairy-free cheese, pesto (check ingredients), hummus base
Low-FODMAP: Avoid garlic/onion, use FODMAP-friendly vegetables, lactose-free cheese
Storage and Make-Ahead Instructions
Storing Dough
Refrigerator: Prepared dough keeps in a covered bowl for 2-3 days. The flavor improves with time. Bring to room temperature before shaping.
Freezer (Dough): After first rise, divide into pizza-sized portions, wrap tightly in plastic wrap, then aluminum foil. Freeze for up to 3 months. Thaw overnight in refrigerator, bring to room temperature, then shape and bake.
Make-Ahead Par-Baked Crusts
This is the ultimate convenience strategy:
- Par-bake crusts as directed (8-10 minutes)
- Cool completely on wire rack
- Wrap each crust in plastic wrap, then foil
- Freeze for up to 2 months
- Top frozen crust and bake directly from freezer (add 3-5 minutes)
Storing Baked Pizza
Refrigerator: Store leftover slices in airtight container for 2-3 days. Reheat in hot oven (never microwave—it makes GF crust rubbery).
Reheating for Best Results: Place slices directly on oven rack at 400°F for 5-8 minutes until hot and crispy. Or use a cast iron skillet over medium heat with a lid to melt cheese while crisping the bottom.